HAPPY NEW YEAR EVERYONE!! :D
I'm on a roll here ;p I just wanted to complete my agito kiwami set so here goes my last agito custom: Burning form!! (ok techincally there is still that white agito guy but I dont have spare agito figures left so this is going to be my last agito kiwami figure so yeah).
Since making my custom kiwami shining agito, I realised i can make a few additional adjustments to a kiwami agito custom to make it nicer and with more details. One such adjustments would be those horns on his head. Instead of letting it have the normal 2 dimensional horns of kiwami agito ground form, I decided to make it into proper 3D horns. I have also decided to add more details on his belt. Anyway enough with the random chat and on with the tutorial :D For this custom i used a Agito trinity form. You can also use a agito ground form (which is better actually but i ran clean out of this already).
Step 1: Cut cut cut
This is actually my least favourite part (yet strangely theurapeutic ;p) of the process due to the fact that you can get cut anytime if you are careless, your blade breaks or the plastic/rubber give way too fast. You must be extremely cautious in this no matter how simple the cut is. Believe me i should know, got stitches done on my hand before due to continuous bleeding from accidentally cutting my palm up. The trick is to get somekind of leverage when you are cutting, perhaps a piece of wooden block to put the item you are cutting on it and aim the blade downwards towards the block. The block (instead of your thumb/hand) act as a foundation so that the item wont move. I use a cheap SGD2 wooden chopping board for this purpose these days.
So yes, you gotta cut away the unnecessary bits:
1) The shoulder pads
2) part of his belt buckle
3) Part of his lower shoulder (part of those those golden bracelets) and
4) part of his back (those small wings of his mainly)
For easy reference please see photos below:
Before the next step, you have to change the shape of his belt buckle from ground form into burning form, so follow the steps i did in changing the belt shapes as described in my custom kiwami shining form tutorial (the immediate previous tutorial i did).
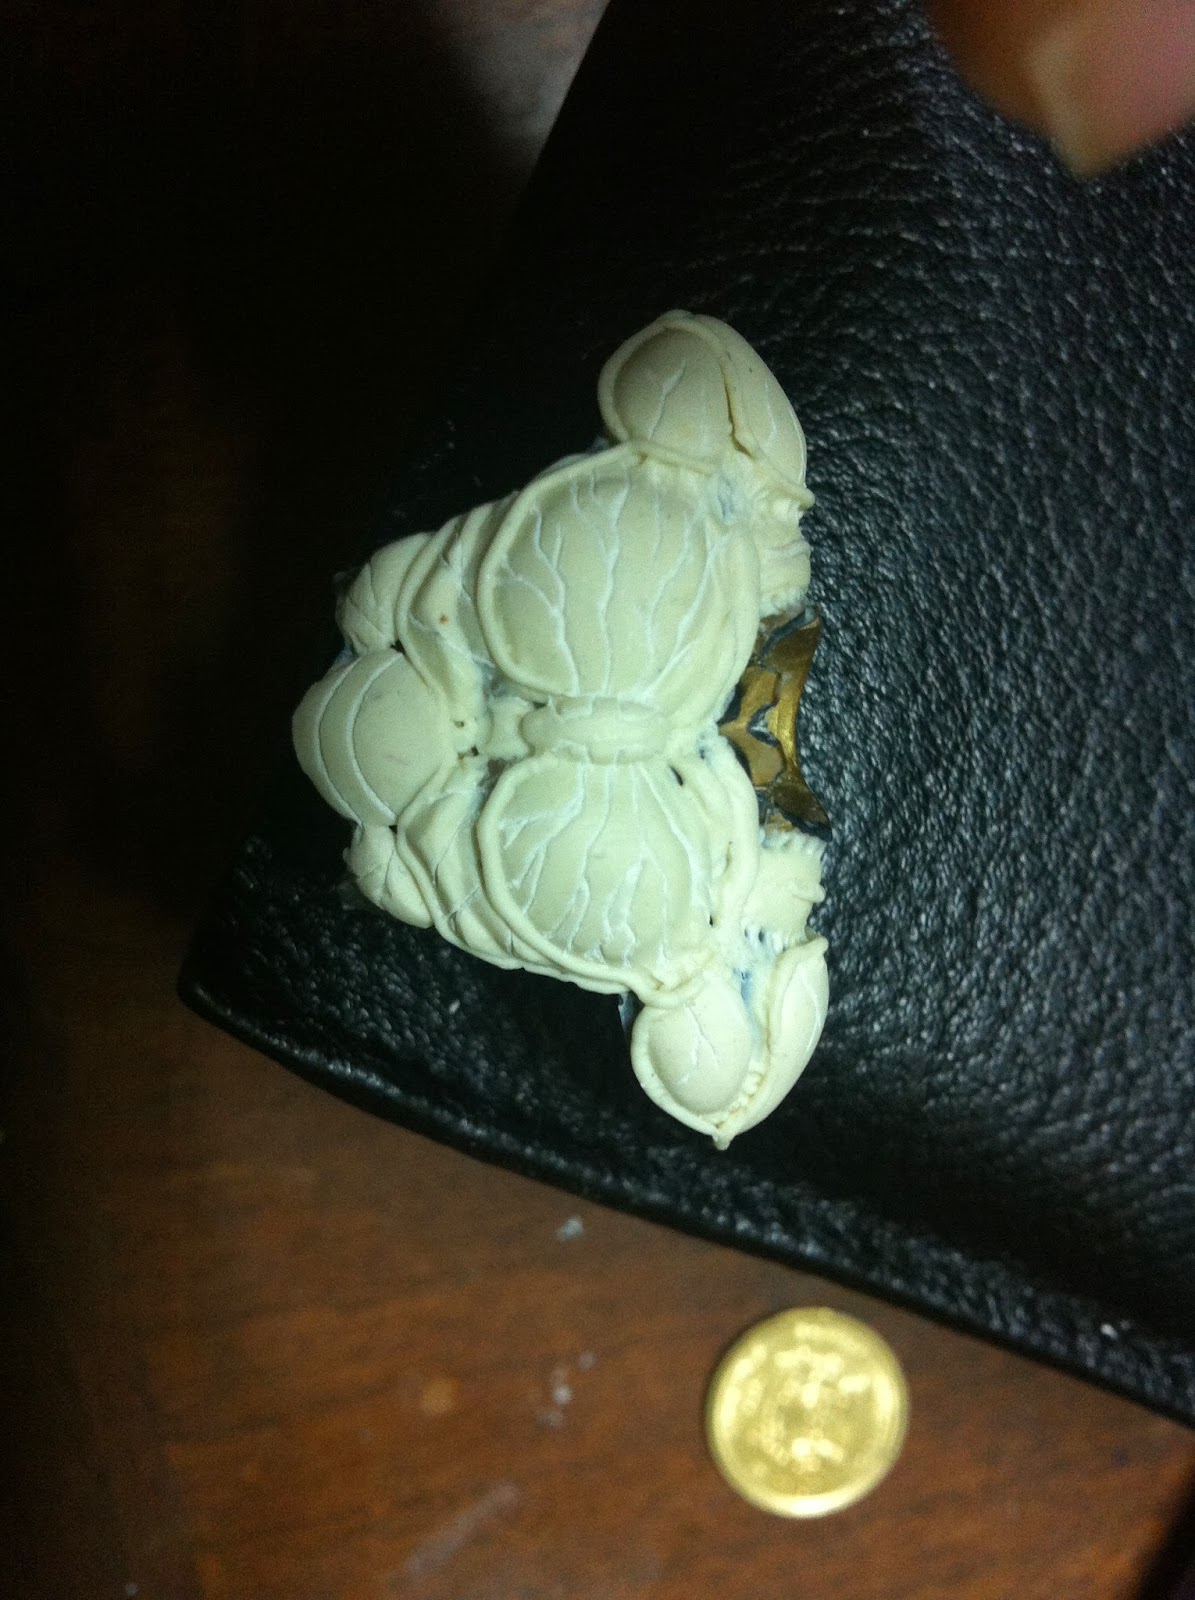
Step 2 Putty time
You will need to do a few layers to complete the sculpt. so the first layer basically is to form basic shapes of burning form. I start by putting layers on his chest, shoulders, shoulder pads, lower arms and the front and sides of his belt. See photo below.
The next part to add putty while waiting for the rest to dry would be the upper legs. Before you begin this putty adding part, prepare a couple of tools first:
1) toothpicks
2) pimple needle
3) ear digger (which i occassionally use to dig my ears in between sculpts ;p)
Ok this part needs detailed sculpting works done on the first layer (you really dont need multiple layers on this). Use your ear digger to form shape on the edge of the putty patch at the top of the thigh to make it flare out a bit. First thing first, apply the putty over the legs on the front and sides thinly. Leave the putty there for half an hour to cure. The reason for this is that by allowing the putty to cure a little, its easier to manipulate it for sculpting purpose.
Once the putty has been left to cure for half an hour or so, staart using your pimple needle to make the bigger lines on the putty. The way to do this is not to use the sharp end of the pimple needle and start poking it into the putty. Hold the pimple needle like you would a pen and then slide the pimple needle over the putty (in a similar way you would a water color brush). This will form crevices over the putty instead of thin cut lines (which is useless in this case). If you would refer to the photo below, those major linings are made using this way. Make lines along most of the edges of your putty patch on the legs. Then make vertical lines at the sides of the legs.
After you are done leave it to dry for a while say 15 mins? I cant remember but its about there ;p The period you should leave it to cure depends on what kind of putty you use, each of them have different period of time to cure.
After this second period of curing, use your toothpick to make smaller lines vertically along the bigger crevices to form details like those you see in the photos below. Feel free to explore new ideas on how to form details on them or just go wild and make your own designs on the leg armor. The main objective was to make the thighs bulkier since burning form agito suppose to be bulkier than other forms.

Step 3: Making those blades on his arms
First you have to add putty on the outer part of his lower arm to form his burning form armor. Once you have made the initial shape of the armor, poke a vertical crevice in the middle of the armor. This slot will be used to insert the blades later.
To make those blades, I have decided to use plastic sheets as their foundation. Not only will the plastic sheets makes the blade stronger and harder to break later, it act as a foundation for me to make proper sculpt of the blades. I cut up a piece of plastic sheet like the one shown in the photo below:
Once the armor on his lower arm cured. measure the plastic sheet on the hole you cut in the middle of the said armor to ensure it can be properly inserted later on. The plastic sheet shown on hte photo below was not the piece i used in the end as i feel it was too small and i cut another piece of plastic sheet to replace it.
To form the shape of the blades, you need to form each blade one piece at a time. This is because its too small and if you try to sculpt it all at once, you will most likely mess up the sculpt of the earlier blade(s) you have made while making another. So what you got to do is to put putty on the plastic sheet and then form one blade on both sides of the plastic sheets and let it cure first. Then the next and the last.
See photo below on the half formed blades and the crevice i made in the armor on the lower arm to allow the blade to be slotted into the arm later.
Once you have formed all the blades properly, super glue the blades on the crevices. Once the super glue dried, add a small amount of putty at the edge between the blades and the armor to cover up the exposed plastics. Using my pimple needle i created organic vein-like details on it. See photo below for final sculpt:
Step 4: The chest!!
This is the most complicated part of the custom. Several putty layers are necessary to make this.
Just a side note here: I have chosed to sacrifice poseability on the arms by sealing in the shoulder pads with putty. This is necessary to display the shoulder pad and chest piece as a single piece of armor for burning agito. Alternatively you can choose to isolate the shoulder pad with the chest piece to allow the arms to be lifted higher and be more poseable at the sacrifice of details and esthetic. Its really is up to you.
Right, so you would have done up an initial layer bu now. You have to add more layers on top of that to form 'muscles' like armor. Add small pieces of putty on the armor to add muscles. Use that pimple needle to shape crevices by 'brushing' over the putties.
There are 2 distinct sculpting tricks here you should know:
1) forming those tiny lines around the armor
2) forming the veins at the cracks between armor
I will descrite how this is done. Its rather simple actually.
1) tiny lines around the armor
For those tiny lines (see photo below left shoulder pad for those lines that runs along between major armor parts), there are 2 ways to go about it. The easy way would be to use thin wires to form them. No need to sculpt. I bought some ultra bendable wires from hong kong some time ago for this purpose. They are as small as those lines you see in the photo below, very bendable and durable. The 2nd way is to form them using putty. Since those wires i bought from hk is extremely rare here i didnt want to use it on a kiwami custom, so I did the 2nd way i.e. putty lines.
Now form a small putty ball no bigger than 1 cm in diameter. Roll that putty ball into a roll of puttyof say 1/3 a cm in diameter. Let it cure for half an hour or 45 mins (depending on the type of putty you use). when its being half cured, cut that roll of putty into a couple of parts. Dip your finger into water and use it to roll thse putty parts into very tiny lines. Since the putties are already half cured, they are more durable and less prone to breakage AND they dont stick too much to other surface (yet). If you find that your lines are not small enough but it has gotten very long, cut the putty line up and continue to roll your putty into tiny lines. You have a limited window to do this as once those putties touches your wet fingers they geta little sticky and sticks to any surface making it hard to disengage them for usage later. Now once you have a thin enough putty lines, put them on the chest armor at the cracks you wanted them in. You dont need to be very precise with the position when you put them on since you can always use your pimple needle (wet with water) to reposition them properly.
You have to do this process fast before those putty lines started to become too sticky or too dry. Once you have placed them in the right places let them dry. There will be instances where the end of your putty lines sticks out of the armor. Use your pimple needle to push them onto the armor.
2) veins at the cracks between armor
To make the armor look more organic plus to seal up all those areas that was not reached by the putty armor layers, i chosed to create vein like sculpts on these areas.
To create these veins, form a small piece of putty and slap it on the crevice/cracks/area you wanted those veins to be in. Leave it to cure for say 10 to 15 mins. Use your pimple needle, hold it like a brush and push it on the putty. Then then push your pimple needle on the surface of the putty but away from the non-cured putty area (like what you would do if you use a knife to put butter on your bread). Repeat this step on the putty surface right next to the hole you created on the putty. If you do the 'brushing' near enough to each other you will form veins in between the 'brushings'. Simple yet workable! :D Repeat this process all over armor to create a bio organic armor for burning agito.
This is the last step for the chest piece: Use a tamiya line engraver (this will cost ya, they dont come cheap and i cant find an alternative tool to do this ;p) to form cracks along the front of the chest and the shoulder pads plus lines for the lower abdomen.
You will get the resulted sculpt below (post primer):
For the back, I use pieces of putty to form muscles over them and then added some tiny putty lines in between muscles. See photo below:
Step 5: The transparent head!!
As any kiwami collectors would know, the agito ground form head is not transparent. Plus those red color on the eyes cant be removed to be replaced with the yellow/orange eyes of burning agito.
This means you will need to re-create the head. First thing to do is add putty on the horns to make them more stylised. I again use my pimple needed to form shapes on them.
Once this is done and the putty is dried, use oyumaru resin to cast a mold for the head. Then use devcon 5 min epoxy putty to create a transparent head! Simple! When applying the devcon 5 min epoxy try to make it as thin as possible. This is to allow the eyes to shin better, I'll explain this later. You will get a head like the one on the left in the photo below. Cut out the original face of the agito head (see photo below on the part to be cut off). Before you glue in your transparent head, paint the entire back of the transparent head silver. The silver reflects light off it making the face and eyes shiny. Now glue the face onto the head plus add putty to the areas where the face and head meets to seal any cracks in between. Let everything dry.
Now color the face with clear red paint and the eyes with clear yellow (or orange, i chosed yellow as i dont like to paint clear orange, very hard to handle). If you form the clear head with a thin enough layer of 5 min epoxy, the light will shine better on the silver layer on the back and gives off more light to the eyes.
See photo below. Notice that i retained the lower 2 original horns that act as a base to glue the transparent head's horns in.
You are finally ready to paint the figure!!!
Follow the instrutions below for the painting process:
1) Paint all the parts that is suppose to be red with super metalli silver paint first (see photo below). Use tamiya paint washer to color the lines on the chest and those small tiny areas between veins black.
2) Let the super metalli silver layer dry then add a clear red layer over the areas that are suppose to be red in burning agito form. You will form a glossy red surface thanks to the metallic silver underneath.
3) Paint those area that is suppose to be black in color with dark iron paint. You will need to apply 2 to 3 layers of dark iron on these to make sure you cover the areas properly.
4) Paint the piece on the middle of the chest with clear yellow.
5) Use tamiya washer to form lines on the crevices all over the figure
6) Use black/ super metallic silver paint to cover up any overlapping paint areas.
7) Paint those tiny putty lines around the chest and shoulder pads with dark iron paint. Again you probably need to do a couple of layers to make sure the paint shows.
Remember to let the paint dry properly between every layers
And there you have it: KIWAMI Tamashi Agito Burning Form!!! Pls enjoy the restof the finished product photo gallery ;D Until the next time!!
A comparison between the earlier shining agito custom and the new burning agito custom:


